What is a thermomosaic, what is the use of it, at what age can a child play with it, what can be made from it, etc.
What is thermomosaic?
Thermomosaic is an interesting material for children's creativity. Especially for those who have not yet heard of it, or have heard of it, but still doubt whether it is worth buying it for their child, I will tell you what thermomosaic is and answer some questions.
Thermomosaic- This is a mosaic, which consists of plastic multi-colored cylindrical beads. These beads are placed on a base - special tablets with short pins (thermal mosaic molds), and then ironed through thermal paper (tracing paper). At high temperatures, the top layer of plastic melts and the beads are held together.
After this, you need to remove the figure from the tablet, wait until it cools down a little, and then separate the tracing paper from it. If everything is done correctly, there will be no harm to the iron :)
At what age can a child play with thermomosaic?
What are the benefits of thermomosaic?
Like any other mosaic, it develops fine motor skills (and a lot has already been said about its benefits for a child’s development), coordination of movements, and trains perseverance and accuracy. For older children, it gives them the opportunity to develop their imagination and imagination. choose colors as you wish, invent your own figures and make crafts and souvenirs from plastic.
How are ready-made thermomosaic crafts used?
Unlike an ordinary mosaic, the pictures of which exist only until the next lesson, the child can play with the results of his work, or he can hang them on the walls to decorate the children's room (you can first glue them to colored cardboard).
These crafts can also be used as:
- pendants,
- Christmas decorations,
- fridge magnets,
- keychains, souvenirs,
- three-dimensional figures for postcards, etc.
You can make a photo frame or an entire painting from such a mosaic.

A diagram of such a cat in pdf format:
www.eksuccessbrands.com/uploadedFiles/Perler_Beads/Projects/TWKittenintheCovers.pdf
What should be in the kit?
The set should contain plastic beads, tablets with pins on which these beads need to be put, thermal paper, which looks like tracing paper, and diagrams.
If you already have tablets, beads can be purchased separately. They are sold in large jars and containers in which beads of different colors are mixed, or in containers with separate compartments for different colors. There are transparent or matte, there are even glow-in-the-dark ones.
These photos show a jar with beads for thermomosaics and a figurine of a cat made from these beads.


As it turns out, beads from different manufacturers behave differently during heat treatment. Some beads remain round (this can be seen in the photo of the cat), while others become square (pay attention to the multi-colored beads that play the role of toys on a three-dimensional Christmas tree, a photo of which will be later in the article). But it is impossible to determine this when purchasing.
You can also buy tablets separately. You just need to make sure that the diameter of the tablets and beads matches.
They come with the usual arrangement of pins (like squares for cross stitch, in the photo - the top two tablets), with mosaic (brick), with circular (in the photo - bottom right) and with arbitrary (in the photo - heart bottom left).

For large paintings there are tablets that fit together like puzzles.
On tablets with a regular and circular arrangement of pins, it is most convenient to come up with your own figures and scenes.
Arbitrary arrangement usually occurs on tablets for making figures of a certain shape (on such tablets you can make hearts, cat figures, horses, etc.). In this case, you can’t create your own figure, you can only change the colors of the beads - it’s like a coloring book.

Color schemes for thermomosaics come on separate sheets of paper so that they can be placed under a tablet made of transparent plastic - this is the most convenient and easiest option for a child (the coin in the photo is for scale, beads with a diameter of 5 mm).

And there are schemes designed in a book - it is more difficult for a child to use them, but it trains attentiveness and develops the ability to work according to the scheme.
Where can I get diagrams for thermomosaics?
If it doesn’t work out or you don’t want to come up with schemes, then The easiest way is to look for them on the Internet. Even small patterns for cross stitch (without half-crosses), patterns for knitting patterns and patterns on squares are suitable.
It is not at all necessary to look for specific diagrams. If you have a good quality photograph of the figurine, then you can assemble your figurine by looking at its image on the screen of your phone, tablet or laptop. At first we did many crafts this way.
My daughter and I came up with diagrams (the diagrams and the resulting figures can be viewed by following the link).
And we made the following crafts:
Schemes of the fairy, goose and duckling are in my other blog, in the article “Figures from thermomosaics”.

On the site “Toy House” has pictures from sets of the company "Era":
- "Princess". Schemes of a prince, princess, castle, carriage, horses and even a three-dimensional peacock: igrudom.ru/obrazcy-dlya-sborki-termomozaiki
- “Zoo”: igrudom.ru/mozaichnyi-zoopark
- Figures for the fairy tales "Teremok", "Little Red Riding Hood", "Kolobok" and "Turnip":
http://igrudom.ru/skazki-iz-termomozaiki/
You can view different diagrams on the website of a foreign company that sells thermomosaics by clicking on the craft you like, and then on each link from the column below, if the craft is complex and consists of several elements:
www.eksuccessbrands.com/perlerbeads/creative/projects.htm
On the same site there is a gallery of works sent by customers, arranged by month. No diagrams, but can be used as a source of inspiration:
www.eksuccessbrands.com/perlerbeads/gallery
And of course, it’s better to see once than to hear a hundred times. A set from one of the thermomosaic manufacturing companies.
Finally, a little trick: if the figurine is intended for play, then it is better to iron it on both sides (of course, only through thermal paper) - this will result in a more reliable fastening of the thermal mosaic beads to each other.
Attention! Follow safety precautions when working with the iron and be sure to explain to the child that only adults can use the iron (for older children - only in the presence of an adult and under his supervision).
Where to buy thermomosaic?
You can buy thermomosaics in a store that sells children's toys, art kits, or order them online.
___
Do your kids love thermomosaic? If so, where do you usually get the diagrams (from a kit, come up with it yourself, from the Internet)?
© Yulia Valerievna Sherstyuk, https://site
All the best! If the article was useful to you, please help develop the site by sharing a link to it on social networks.
Posting site materials (images and text) on other resources without the written permission of the author is prohibited and punishable by law.
Thermomosaic is an excellent material for creativity with children over 3 years old. It is a set of colored plastic cylindrical beads, which are laid out in the form of a pattern on a special base with pins, and then ironed through thermal paper (parchment). When heated, the top layer melts and the beads are connected to each other, forming a solid figure. Thus, together with your child, you can create various crafts from thermomosaics: jewelry and accessories, home decor, toys and gifts for the holidays.
Instructions for working with thermomosaic
You will need:
- beads for thermomosaic (in, in, on);
- base for thermomosaic (in, in, on);
- a set of forms for thermomosaics (in, in, on);
- thermal paper (in, in, on) or replace with baking paper;
- tweezers (on);
- iron;
or use a ready-made set for thermomosaics (in, in on).
Thermomosaic is suitable for children 4-5 years old, but there are also sets for children aged three years and older - they differ in the size of the beads; in sets for the youngest they usually have a diameter of 10 mm.
Standard sets for children over 5 years old are equipped with beads with a diameter of 5 mm, and for older children - very small ones, 2.5 mm in size.
Different sets of thermomosaics are equipped with different tablets with pins. They can be in the shape of a butterfly, horse, bunny, etc. There are also universal bases - square, round, oval. The first ones are easier to use, the second ones are more practical and provide more room for creativity. It is best to have both, start with blanks and move on to free creativity. If the child is old enough, then you can only get by with universal tablets.
How to do
1. Let the child independently lay out the pattern on the form, placing the beads on the pins (use tweezers for convenience). You can assemble the mosaic according to the diagrams, or you can do it at your own request, relying on your imagination. It is very convenient for kids to use a transparent tablet, under which they can place a template and assemble according to it.
2. Heat the iron to medium heat.
3. Then place thermal paper on the finished image and carefully iron the mosaic surface with a hot iron in a circular motion. (this step is only allowed for adults or children under parental supervision). This will take about 10 seconds.
4. Remove the resulting figure from the tablet, turn it upside down with the untouched side. Place on a flat wooden surface. Cover with paper and iron for another 10 seconds.
5. To ensure that the figurine does not deform after cooling and remains flat, it is necessary to place a weight on top for several minutes.
What does thermomosaic develop?
Classes with thermomosaics provide many opportunities for shaping a child’s personality. In addition to developing fine motor skills, it provides opportunities to play with colors, which helps develop artistic abilities, imagination and creativity. The ability to lay out drawings according to diagrams develops the ability of visual-motor coordination of movements, which is important for preparing children for writing. Counting the number of necessary parts and rows in a drawing will certainly help in the development of the child’s mathematical abilities and his intelligence. When laying out figures from thermomosaic, in addition to developing abilities, children develop such character qualities as patience and concentration, accuracy and attention.
What to make from thermomosaic: ideas for crafts, diagrams
Bookmarks
Together with your child, create colorful bookmarks for books from thermomosaic and large paper clips. Lay out the thermal mosaic according to the diagram (download), iron it through thermal paper, glue the finished figures with hot glue to paper clips.
Source: perler.com
Bookmarks “Fruit” made of thermomosaic and wooden ice cream sticks (diagram).

Source: perler.com
Accessories and decorations for children
Thermomosaic bracelets
Option 1. Place thermal beads in any color combination on the base. It is important that the ends of the future bracelet are made at different angles for proper alignment. Iron through thermal paper. Take the strip while it is still warm and wrap it around the glass, making a bracelet. Run the iron over the surface of the bracelet again to secure the ends.

Source: diycandy.com
Option 2. Even a 4-year-old child can make a simple bracelet from thermal beads. First, flatten the beads with an iron, wait until they cool down and invite your child to string them on an elastic thread.

Source: craftandcreativity.com
Option 3. Weave a bracelet from thermal beads in the same way as beaded jewelry is woven according to patterns.

Source: diycandy.com
Thermomosaic headbands for girls

Source: perler.com
To make it you will need: a simple headband (on), a thermal mosaic (diagram) and a heat gun for gluing decorations to the headband. Source: perler.com

Source: eighteen25.com
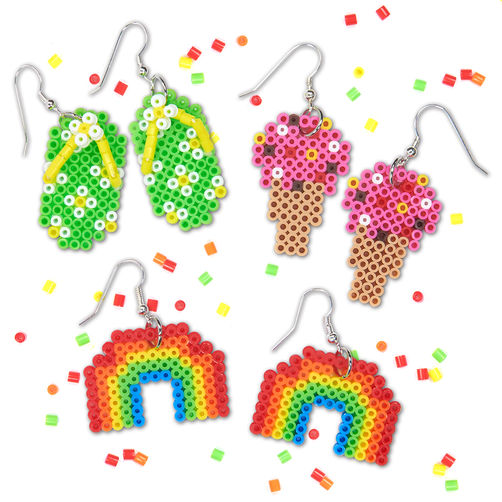
Summer earrings made of mini thermobeads
Source: perler.com
Thermomosaic necklace

Source: thecraftedsparrow.com

Invite your child to draw their own design for a future necklace.

Source: blog.modcloth.com
Buttons for children's clothing
You can use thermomosaics to make bright buttons for a child’s outfit.

Source: makermama.com
Molten thermomosaic hair clips
Cover a baking sheet with baking paper, lay out a pattern of thermal beads and place in a preheated oven at 200 degrees. oven for about 10 minutes. When the beads are melted, remove the pan from the oven and let cool. Glue the finished figurine to the hairpin with hot glue. A bright hair accessory is ready!

Source: the36thavenue.com
Carnival masks
Thermomosaic mask for girls (diagram).

Keychains "Fruit"

Source: mypoppet.com.au

Phone case decor

Gift decoration
Creating holiday packaging is a very exciting process that will appeal to both adults and children. With thematic figures from thermomosaic, you can make original gift wrapping for any occasion.

Source: meinfeenstaub.com
Festive packaging for the New Year

Thermomosaic cards
Postcard for St. Valentine's Day (diagram).

Source: perler.com

Home decor made from thermomosaic tiles
Pencil holder

Garland

Thermomosaics are small beads made of thermoplastic plastic that can be laid out in interesting patterns on a special form. After heating the prepared pattern, the beads are soldered together into one whole craft! Thermal mosaic is relatively inexpensive, and you can make patterns and figures of any shape from it. Once you purchase thermomosaics from your local craft store or online store, you will be successfully creating your creations in no time.
Steps
Part 1
Creating a pattern from thermomosaic- tablet base for thermomosaic;
- iron;
- parchment paper (or tracing paper);
- thermomosaic.
-
Select a suitable flat base or thermomosaic mold. There are quite a lot of thermomosaic molds that you can use for your crafts. For example, you can make a figurine of a dog, fish, shoes, make a hexagon, and so on. Manufacturers of thermomosaics produce a wide variety of ready-made forms, but you also always have the opportunity to use a regular tablet base for thermomosaics and lay out your own pattern on it.
Prepare beads of suitable colors. Small thermomosaic beads are sometimes quite difficult to remove from their containers. In order not to fight with the beads while working, trying to get the right one each time, it will be more convenient for you to arrange the beads by color in separate bowls or baking dishes.
Assemble a thermomosaic pattern in accordance with the diagram. If you are working with a ready-made thermomosaic mold, for example, in the shape of a cat, you can place beads on the pins of the mold as you wish. If you use a transparent tablet base, then before starting work you can place a sheet with a diagram under it, or you can simply come up with and create your own design.
Part 2
Locking the created pattern-
Warm the beads on one side. Take parchment paper (or tracing paper) and cover the beads assembled on the base with it. Be careful not to accidentally push the beads out of place. Heat the iron to medium heat and then slowly iron the paper using a circular motion with the iron. It will take you about 10 seconds to solder the beads together.
Warm up the beads on the reverse side. After the beads and the base itself have cooled a little, they can be turned over to the other side. As a result, the craft will be removed from the pins and expose the unheated side of the beads.
Remove the paper from the craft and let it cool. Grasp the corner of the paper and carefully remove it from the beads. The beads will be quite hot when you first finish ironing them, so give them a few minutes to cool before handling your thermomosaic creation.
- Now your work is completely ready for display! Remove it from the base and show your friends what you have created.
Part 3
Additional Creative Techniques-
Make your thermomosaic works sparkle. This technique will allow you to add a magical touch to your crafts and will be useful when making figurines of ponies, unicorns or fairies. Just take some small glitter and sprinkle it on the beads you assembled on the base before ironing them. When you solder the beads together, the finished craft will already shine!
Create decorations from thermomosaic tiles. Line a baking tray with parchment paper and line it with oven-safe metal cutters. Then fill the molds with thermomosaic beads. In this case, you can use beads of the same color or different colors. Just don’t pour the beads into the molds all the way to the top, otherwise the plastic may spill over the edge of the mold during baking.
Make a thermomosaic cube. This craft is best done on a medium-sized square tablet base. Place two separate rows of three beads on the base. Then lay out three figures in the shape of the letter “H” with sides three beads high. The center bridge of each letter should be a single bead. All parts must be separated from each other by at least one row of empty base pins.
- Keep unused thermomosaic beads away from small children. They can pose a choking risk if a child chokes on them.
-
Prepare everything you need to work with thermomosaic. You will need a flat, stable surface to prepare your design. The special flatbed base for thermal mosaics has short enough pins for installing beads, so due to the uneven working surface, the beads can jump off the pins. In general, to work with thermomosaic you will need:
Most often, the public condemns adults who fall into childhood. But, you must admit, sometimes it’s so nice to forget about everyday problems and worries and enthusiastically immerse yourself in the wonderful world of children’s games and entertainment.
The other day I was lucky enough to briefly return to my carefree childhood. And it happened completely by accident.
Late in the evening, wandering around Pinterest in search of interesting ideas for New Year's crafts, I came across photographs of works made from thermomosaic.
The IKEA set, which was a gift to my daughter for her birthday, consisting of plastic beads, thermal paper and special plastic bases with pins for laying out thermal mosaics, had been lying idle in our house for several months.

And suddenly I realized that I definitely needed to test the thermomosaic in action, and right away make something out of it. I had to sneak like a spy into the room of the sleeping children and take out a jar with the treasured beads from the shelf.

Thermomosaic is laid out according to the same principle as regular mosaic. The only difference is that the beads are not inserted into the holes of the base, but are strung on special plastic pins.

In addition, thermal mosaic beads can be fused together by ironing the laid out picture through thermal paper, and ultimately get a solid figurine for games or interior decoration.
So, everything is ready for work. All that remains is to decide on the image that is to be laid out from the thermomosaic.
Like most adults, it didn’t even occur to me to turn on my imagination, which was sleeping because it was late, and I decided to look for ready-made patterns for thermomosaics. There were more than enough of them on the Internet.
That is why my choice may surprise you. Why? Yes because I decided
make your own Minion – a character from the cartoon “Despicable Me”

The fact is that my children are delighted by the contemplation of this creature on the computer screen, and after watching the cartoon they play “minions” for a long time.
I was inspired to create my own thermomosaic minion by these three patterns:


1. Having made some minor adjustments to the sample diagram, I laid out my minion from thermomosaic beads on a special plastic form.

2. Covering the laid out image with thermal paper included in the thermomosaic kit, ironed it with a very hot iron for 3 minutes.

The top edge of the plastic beads melted and the beads joined together.
3. Then I carefully removed the paper and placed the thermomosaic minion figurine on a flat, hard surface so that the melted side of the figurine was on the bottom and the raw edges of the beads were on top.

I covered the figure again with thermal paper and ironed it with an iron.
Many lovers of thermomosaic crafts iron only one side of the figurine. However, beads melted on both sides hold tighter, and the figurine is more durable and durable.
4. After letting the minion figurine cool a little, I removed the thermal paper and placed the finished figurine under a press for several hours so that the thermomosaic craft did not lose its shape during the hardening process.
I’ll tell you a little secret: in fact, the little minion is not alone. He has a twin brother (well, almost a twin) - the first, in my opinion, not entirely successful experimental copy. As they say, find ten differences:

In general, the process of creating crafts from thermomosaics turned out to be fascinating, and perhaps you will see our new products using this technique on the blog for creative mothers and grandmothers.
And now the answers to some questions that may arise in your mind while making thermomosaic crafts:
What can replace special paper for thermomosaic?
When you have such a huge jar of beads as I have, 2 pieces of thermal paper is unforgivably not enough. Especially if you don’t yet have the skill to work with thermomosaics.
Thermal paper can be replaced with tracing paper. But it is best to iron the thermomosaic beads through baking parchment. Tested: it does not stick to the molten figurine and can be easily removed.
To what temperature should the iron be heated to make thermomosaic crafts?
Personally, I prefer to heat the iron to maximum in the “cotton” or “three” mode. This way the beads melt faster.
Do not overdo it when melting plastic thermomosaic beads with a hot iron! Otherwise, you will get a thin melted pancake (see above: Minion No. 1 - experimental).
How many minutes does it take to iron thermomosaic beads?
An image made of plastic beads is melted with an iron heated to maximum temperature for 2-3 minutes on each side (or on one side as desired). It all depends on the iron and on the quality of the figurine you want to receive.
For example, I prefer figures without holes, so I iron the image from a thermomosaic longer with an iron.
Where can I get diagrams for thermomosaics?
Look for diagrams for thermomosaics on the websites of manufacturers. There, the pictures on the finished sets are presented in good resolution, and when enlarged, you can easily see the diagrams of the figures.
You can use simple cross stitch patterns as patterns for laying out thermomosaics.
Where to buy thermomosaic?
Sets of thermomosaics, beads and base forms for them can be purchased in art supply stores, in children's toy or stationery departments, or you can order thermomosaics in an online store.
Forget about household chores - remember how great it is to be a child with HobbyMama!
Thermomosaic appeared in Ikea many years ago, but it only now dawned on me what a must-have it is.
In case anyone hasn't encountered it, these are plastic beads and a field with pins. We lay out the pattern we need, iron it (through fabric or paper) with an iron - and the beads stick together, that is, in the end we get a solid product.
I personally see a lot of advantages
This activity actively trains fine motor skills (it’s quite difficult to manage these beads, by the way!), imagination (if you take the pictures from your head) and attentiveness (if you use ready-made diagrams).
And as a result, we get a unique toy, only yours. Literally anything can be done! It's almost like a 3D printer, only 2D)).
Although there are advantages here too - two-dimensional toys take up very little space when stored)))
There are tons of schemes on the Internet!
And if you choose the colors, you can also use patterns for cross stitch)


You can find many gift ideas for grandmothers :). Coasters for mugs, photo frames, pencil holders, etc.


Well, it’s an ideal solution for New Year’s decor.


And if you really want it, then 3D crafts become quite accessible)


Some technical details)
All posted examples are smoothed out rather weakly. As a result, they look nice, but won't stand up to long-term play. I stroke harder. Moreover, first on the platform, and then I remove it from it - and iron it one more time just on a hard surface so that all the parts are firmly fused together. It turns out something like this.


On the left is before ironing, on the right is the finished result.
The reverse side is completely smooth.
Don't forget to put down paper so that all this beauty doesn't end up on the iron))). And keep in mind that if there are unfilled areas on the platform, they can also be damaged with an iron if you are careless. Make sure it is in the same plane. My platform, if you look closely, is already damaged in the corners. On the new one I will place a couple of beads in the corners before ironing
Manufacturers.
We have Ikea. Sold in large jars, a mixture of 10 colors. A set of platforms is purchased separately. One big and three small. The photo above is small. There is also a round and heart-shaped one. The round one is indispensable for snowflakes and flowers.
I rummaged around on Aliexpress - mainly the manufacturer Hama is represented there. Search for "Hama beads 5 mm" (exactly 5 mm). Their color palette is much richer, you can find