A large number of holidays, tourists, as well as numerous traditions are a fertile field for developing a souvenir business. A huge niche is occupied by industrial manufacturers of all sorts of standard gizmos, but nowadays unique handmade items, which are often a single copy or are produced in such small quantities that it is difficult to find two identical ones, are becoming increasingly popular. And who among the handicraftsmen does not dream that his hobby could bring in a completely acceptable permanent income.
Features of this business
Of great importance for the success of such a business are the organizational skills of its creator, the willingness to devote a little more time to this than a couple of hours on weekends, and also to bear the corresponding costs.
However, every year many begin to scale up their production, choosing their own directions and determining the circle of consumers. What are the features of such a business and its attractiveness?
 As main positive points The type of income under consideration can be called:
- minimal initial costs;
- no need for compilation (but it’s better to still calculate it);
- the ability to create a convenient work schedule;
- convenience of production and sales planning based on previously known periods of demand growth;
- You can only work at home.
Despite the fact that we are talking about a home business, if successful, the income from its implementation can be quite high. At the same time, it is not always necessary to go to the traditional market and sell souvenirs from a tray; you can sell through online sales (you can even create your own). Traditionally, such production is of a family nature, members of the founder’s family are involved in the production, but it may also be that the organizer acts as an intermediary and sells products that are made by other craftsmen.
Eat a number of recommendations that should be taken into account before deciding to start such an activity. So, you need to decide sources of materials for the manufacture of products, and here a regular store that carries out their retail sale will not be suitable, since this will significantly increase the cost and will not ensure the stability of the replenishment of certain product groups.
Choosing a direction as the basis for successful business
When forming the basic idea and planning your business for producing souvenirs at home, you need to have a clear idea of the direction in which it will be implemented, its nuances, as well as the consumers of souvenirs, the so-called target audience.
For example, various kinds of magnets or other objects with images of historical landmarks are in demand exclusively in offline sales close to objects included in the regular excursion program, and especially in the summer. And the peak sales of love-themed souvenirs occur in February-March (due to the corresponding calendar holidays).
 So thoughtful and correct choosing a business direction for the production and sale of souvenirs is the basis for a successful future business. At the same time, it is not necessary to stop at only one type of product; you can combine them, producing several versions of items united by a common theme, for example, calendar holidays.
In anticipation New Year's Day, Valentine's Day, February 23rd or March 8th There is a great excitement for souvenirs of the corresponding theme. These can be sets of handmade soap, shaped cookies, bouquets of sweets, etc. Proper design and proper presentation will add regular customers and sales volumes for the next significant dates. In addition, the manufacturer should prepare for the holidays in advance by having some stocks in stock, both of the product itself and the materials for its manufacture.
See the following video for souvenir options for various holidays:
A specific subcategory of this area are goods Orthodox orientation, which are purchased exclusively for major holidays such as Easter and Christmas. In this case, not only the quality of execution matters, but also the presence of the necessary religious knowledge so that the item truly corresponds to the purpose of acquisition.
 A special segment in the market is occupied by tourist souvenirs, which are associated with a specific location (city, region, country) or historical landmark. It is necessary to be prepared to compete with industrial manufacturers, because... their products are cheaper and therefore more accessible. In this case, uniqueness will matter. For example, souvenirs that reflect the craft common in the region (clay figurines, products made of birch bark or wood, lace, etc.) are very popular.
As an independent direction we can call the production of souvenirs sports theme. There is also high competition with industrialists here, since fans prefer to shop in special stores, you need to rely on connoisseurs of individual things. At the same time, it is very important to take into account the specifics and limitations of this business, since it is easy to break the law. For example, unauthorized use of a registered team or club can lead to dire consequences. In this segment, printing on T-shirts and mugs and the production of other goods with images of sports heroes have become widespread.
A huge niche of the market in question consists of original works. Their distinctive feature is not only their high uniqueness, but also their corresponding price. Each souvenir within this direction, as a rule, is a work of art, which requires a high level of qualifications and creativity from the master. This can be original soap, candles, or objects using various decoupage techniques, wood and metal products, beads and glass. The choice of options is huge.
As a rule, women are the founders of the business of producing souvenirs at home, but men have recently not been inferior to them, engaging in types of craft that are traditionally their prerogative (engraving, casting, etc.).
For an example of making souvenirs for the New Year holidays, see the following video:
If you have not yet registered an organization, then easiest way This can be done using online services that will help you generate all the necessary documents for free: If you already have an organization and you are thinking about how to simplify and automate accounting and reporting, then the following online services will come to the rescue and will completely replace an accountant at your enterprise and will save a lot of money and time. All reporting is generated automatically, signed electronically and sent automatically online. It is ideal for individual entrepreneurs or LLCs on the simplified tax system, UTII, PSN, TS, OSNO.
Everything happens in a few clicks, without queues and stress. Try it and you will be surprised how easy it has become!
Materials and tools for work
What materials for production choose souvenirs. Their list is long. It can be:
- tree;
- beads, beads or natural stones;
- glass or ceramics;
- gypsum, clay (including polymer);
- metal;
- fabric, yarn;
- paper;
- coffee beans;
- sweets, etc.
The choice of specific material depends on the direction and name of the souvenir products intended for release. Often, for the production of business souvenirs, a ready-made base is purchased in advance, which is further modified to give it individuality: a drawing is applied or a photo is printed, the appearance is improved in other ways.
 In addition, it is used for work additional equipment and tools, the set of which also depends on the type of product and manufacturing methods. So, for example, to apply a picture you may need to purchase a special printer, machine or press, which will require significant financial investments, both at the initial stage and subsequently, when the tools become “morally” or physically obsolete.
Sales of own products
 An important question is about sales of products, and there are several options here. In case of increasing the scale of production, attracting other masters to participate in the business, as well as taking into account the direction and souvenir theme, it is advisable opening a small souvenir shop
, which can be located in a place where they will be in greatest demand (in a large supermarket or shopping center, not far from attractions, sports facilities, depending on the nature of the product). If such an opportunity is not available, which often happens at the starting stage, then you can negotiate with existing sales points
to supply them with souvenirs “for sale.” All these sales methods involve offline sales.
An important question is about sales of products, and there are several options here. In case of increasing the scale of production, attracting other masters to participate in the business, as well as taking into account the direction and souvenir theme, it is advisable opening a small souvenir shop
, which can be located in a place where they will be in greatest demand (in a large supermarket or shopping center, not far from attractions, sports facilities, depending on the nature of the product). If such an opportunity is not available, which often happens at the starting stage, then you can negotiate with existing sales points
to supply them with souvenirs “for sale.” All these sales methods involve offline sales.
With increasing sales of goods through the Internet You can’t help but consider this option for promoting your products. To begin with, you can use existing Internet resources, which are essentially electronic platforms for trading goods from different craftsmen. Opening your page on such a site will allow you to advertise your products for a small fee, contact potential buyers, and use various tools to attract them (master classes, competitions). In addition, such platforms send out offers and hold various exhibitions, which allows craftsmen to implement marketing activities at low cost.
You can also create your own own online store . This is a great option when the business has been developing steadily for a long time, offering a large range of products. The presence of such a resource makes it possible to attract not only ordinary consumers, but also corporate buyers who need to be convinced of the seriousness and high level of the performer. Making souvenirs with corporate symbols is a fairly large and well-paid order. To achieve this goal, you need to be prepared to pay for the services of specialists to create websites and fill them with information.
 And if there is no money for an individual resource or placement on specialized sites, you can promote your souvenir products using social networks
, create new pages or use your usual ones (in contact, classmates, etc.).
And if there is no money for an individual resource or placement on specialized sites, you can promote your souvenir products using social networks
, create new pages or use your usual ones (in contact, classmates, etc.).
Basic rules of doing business
It doesn’t matter who the buyers of souvenirs are, this business is carried out according to certain rules, contributing to its development. The main ones are:
- Openness and publicity. There is no need to hide the production of souvenir products from others, you need to actively promote it, participating in exhibitions, giving master classes, making promises with potential buyers at various forums, and it does not matter which method of selling products is chosen;
- Particular attention is paid to the method of presentation. Sometimes the packaging of a souvenir is more important than the souvenir itself. You can’t skimp on it, as well as on additional little things. When sending your work to the customer, you can include a small additional gift. This will make the buyer receive pleasant emotions and will force him to contact him again;
- Development and improvement. You always need to improve your skill level, develop a direction, and increase your assortment. This is facilitated by the acquisition of new skills, equipment, and work with new materials.
Registration of business activities
Well, of course, we must not forget about the legal restrictions on doing business. Whether to formalize your business or register it depends on the format and scale.
 If, in fact, the handicraft production of souvenirs brings in a small side income, for example, seasonally, when products are made for specific holidays and in small volumes, then there is no reason to register a business activity. However, we must not forget that payment obligations no one canceled. Therefore, in order to avoid problems with fiscal authorities, tax discipline should be observed, because there is a risk of administrative liability.
If the souvenir business provides a constant and stable income, then it is better to register it in the manner prescribed by law. It could be. The form of ownership is most appropriate when a business is sold by one person, but if several masters unite, the most suitable form will be .
Business registration has many positive points. For example, many suppliers of materials for the production of souvenirs do not have retail outlets and therefore work only with entrepreneurs. And if this is the main occupation for a citizen, when making appropriate deductions, the periods of time during which he carried out the business in question will be counted towards his length of service. But when becoming an official business entity, you need to be prepared to comply with the requirements of legislation on retail sales and consumer protection.
To decide on the form of conducting business - as an entrepreneur or without such status, the question of its profitability is important. It is quite difficult to make an accurate calculation of all costs. All aspects of doing business matter here: from the name of the product, materials to the method of selling it.
 Income will be the profit received after deducting from the proceeds all costs associated with production, sales, and payment of taxes. In addition, it is necessary to calculate the payback of the equipment, because the costs of its acquisition are also subject to accounting.
However, even with very high costs, there will be a profit, otherwise it is not worth doing this business. The average serious cost (for equipment, training, etc.) is 1 year, but this is an approximate period, since everything depends on the success of the activity (orders, sales volumes, etc.).
Find out how to give a gift to your mother, grandmother, father, grandfather, daughter. Find out what and how to give a cool birthday gift to a friend.
The content of the article:
Everyone has a birthday. So that family members, friends, and co-workers do not have any unresolved questions regarding what to give to the birthday boy, check out the options presented. Then the child will know what to give to mom and dad, not only for this event, but also on March 8, February 23, and adults will decide what to give to a friend, loved one, friend.
How to give a gift to your mother and grandmother?
Of course, any parent is pleased when her beloved child makes it with her own hands. She will keep such a personalized card for a long time and joyfully remember how the child presented it on her mother’s birthday.

To make a postcard you will need:
- colored paper;
- pencil;
- glue;
- colored cardboard;
- scissors.
The son or daughter will decorate the wrist at their discretion with pieces of colored paper, gluing them to the hand. Now you need to glue the flowers to the front side of the card, tucking your thumb under them, and place the rest on top of the bouquet.

Here is a gift you can make with your own hands to a child for his mother, like the next one.

Draw a mug on cardboard, then cut it out and decorate it with flowers from colorful paper. Cut out other flowers from it; they need to be glued to the back of the mug. Even small children can make this application.
In general, flowers are a win-win handmade gift for mom. Therefore, a child can make a bouquet of tulips from colored paper and give it to her or grandma. The scheme for creating such a flower will certainly help with this.

It will not be difficult for older children to twist such flowers from colored paper.

First you need to cut a square out of it, then fold it along one, and then along the second diagonal, fold it so that you get a double triangle. At this stage, the workpiece will turn out exactly the same as when creating the tulip in the fifth picture. These paper color schemes are presented just above. Now you need to wrap the first corner of the resulting triangle on a rod or thin stick, then the second, third and fourth edges.
When twisting the petals, pay attention that they need to be wrapped in one direction.
Make 3-4 such parts, glue their edges together, leaving a small hole. You need to put a wooden stick painted green in it, and the gift for your mother is ready.
Fabric flowers will also become a bright accent on this holiday. If you have a piece of felt or an old coat, give your child a chance to express their creativity. To make such a flower from fabric, you need to cut a circle out of it, which will become the core. Petals are glued to it. For them you need to cut the felt into triangles. Having slightly trimmed the lower opposite corners, they need to be aligned and glued.

Gift for grandpa and dad
By making it, the child learns the basics of origami. Let him roll up a shirt from paper and present this gift to the birthday boy or man on February 23rd.

We start creating a gift for dad or grandfather by taking a rectangular sheet of paper, bending it in half to mark the middle. We will need it, because we need to pull the right and left edges of the sheet to it.
We make the collar of the shirt, bending the upper right and left corners to designate the sleeves. In Figure “7 a” you can see what should come out of this. Fold the bottom up, pulling it toward the collar. The result is an origami shirt. All that remains is to decorate it. You can glue a pocket, cut a tie out of paper, and give a birthday gift to your dad or grandfather, made with your own hands.

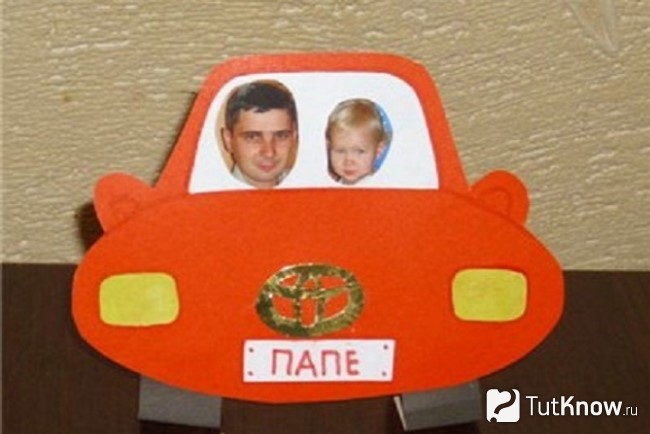
A souvenir photo will also be a wonderful present. Let your son or daughter make a photo frame with their own hands. For it you will need:
- red, white, yellow, black cardboard;
- scissors;
- glue;
- pencil.

First, the necessary elements of the machine are drawn on the back of the cardboard. If difficulties arise with this, enlarge this photo and redraw it on tracing paper, and then on cardboard. Next, white glass, black wheels, and yellow headlights are glued onto the red car. Photos are attached in the same way. On the number plate you need to write to whom the gift is addressed.
My daughter can quickly sew a funny kitten from an old sock and give it as a gift. For this you need:
- sock;
- padding polyester;
- threads;
- needle;
- scissors;
- pencil or pen.

Matches gift for a friend
If you want to give a cool birthday gift to a friend, then make a star or snowflake from matches. This is completely waste material, because usually such used items are thrown away.

Draw the shape of the future gift, cut out a cardboard blank according to it. Now you need to divide the star into segments with matches and lay out the first sector with them.
To make the job easier, coat a small area of cardboard with glue, then place several matches tightly together. Press them lightly with your hand for a better fit.
Cover all the cardboard this way, and you can go visit and wish your friend a fun happy birthday. If your friend is unlikely to appreciate such a joke, then you will have to spend money, but very little, only on:
- a piece of dense fabric - felt or felt;
- pencils - set of 24 pcs.;
- decorative cord.
Felt is a hard material, so it is better to first soak it in hot water and then dry it. It will become softer and more pliable to work with.

Step back 1 cm from the edge of the felt, make 3 thin cuts parallel to it, into which insert a leather cord folded in half. You managed to make a birthday present with your own hands. All that remains is to insert the pencils, roll the felt into a tube, tie this scroll on a cord and give it to the birthday person, for example, a classmate, work colleague or friend.
Interesting DIY gifts for your loved one
You can make such a gift for both a friend and a dear loved one.

For it use:
- cardboard;
- wrapped candies;
- 1 large and 6 small chocolates;
- braid;
- glue;
- white threads or fishing line.
Place 6 small chocolates on the neck of the guitar as in the photo, on top of them place “strings” from cut identical fishing lines or threads. Secure them on one side with a large chocolate bar, sticking it behind the wrapper. On the other side there will be 3 candies, under which tuck the opposite edges of the threads.
Now all that remains is for your loved one, relative or friend to frame the guitar with candies in 2-4 rows, gluing them.
The next gift to your loved one, made with your own hands, will help him never lose his ballpoint pens. Such a gift will remind him of you at home or at work if he takes it to the office and puts it on his desk.
For this gift you will need the following:
- 6 cork coasters for hot dishes;
- pencil;
- glue;
- drill and drill for it;
- and pens for gifts.

If you wish, you can apply paint to the gift using a spray can or leave it as is - it looks very stylish.
What can you give your friend for her birthday?
The next gift can be made not only for her, but also for mom, dad, loved one, friend - it all depends on the age of the donor and the preferences of the person receiving the gift.

This original hedgehog will exude an intoxicating aroma consisting of the smell of coffee, lemon, and cinnamon.
To make it we will use:
- plastic ball;
- coffee beans;
- cardboard;
- leg-split;
- scissors;
- dark brown paint;
- brush for painting;
- beads for the nose and eyes;
- glue gun;
- dried lemon slice;
- cinnamon;
- a piece of polystyrene foam or 2 cotton pads.
Cover half of the ball with brown paint and let it dry. Now wrap the twine around the hedgehog’s face and, if you wish, also around its abdomen.
We begin to glue the coffee beans, placing them close to each other, slightly tilting them in the other direction from the hedgehog’s nose.
To make a gift for a friend look beautiful, glue the grains first from the center of the animal’s body towards its hind legs, and then from the same middle part to the muzzle.
Then glue the lemon and cinnamon sticks to them, and secure the beads in the same way as the eyes and nose. The fragrant gift is ready. The video at the end of the article shows in detail how to make it yourself.
Speaking about what you can give to a friend for her birthday, on March 8, or just because, you can tell how to make a beautiful hair tie with your own hands.
To do this, take the following materials and equipment:
- elastic band;
- yarn and hook or fabric;
- scissors;
- glue;
- a large button on the leg.
Glue this circle to the button, folding the edges. All that remains is to take a matching elastic band, tie it on the leg of the button, and you can give a gift to your friend, made with your own hands.

She will probably like this original necklace too.

Cut the collar from the shirt, fold its lower edges inward, and stitch. Rip off the placket along with the collar, on one side of which a button is sewn, and on the other there is a slotted loop for it. These parts are used to fasten the collar around the neck. Hide the button under the decorative piece that is sewn to one side of the collar.
Gift for daughter
It’s good if it’s customary in the family to make them yourself. Raise your children in a creative environment. Present a beautiful stroller and doll that you will design and make yourself. If you are invited to a girl’s birthday party, you can put a banknote in the doll’s hands.

Here's what you need to get started:
- colored cardboard;
- compass;
- scissors;
- ruler;
- tape measure;
- pencil;
- lace;
- braid;
- glue.

Now glue two semicircular parts of the stroller with a strip that is placed between them.

Cut out the wheels from black paper, and let the rims for them be the same color as the stroller itself.

To make sure she likes your daughter’s birthday present, decorate the stroller with braid and glue it on.

For the doll, sew a skirt and a bell hat from lace. Attach the satin ribbons to the cap using a glue gun.

These are the kind of gifts, lovingly made with your own hands, that you can give to a loved one, thereby once again showing your wonderful attitude.
Watch the promised video right now and feel free to start creative work:
2. Bookmarks made from funny photographs.
Delight your grandparents with such original bookmarks,
made from photographs of grandchildren

3. DIY bath bombs
An original and useful gift that is easy to make

4. Monogram - photo collage
In order to make such a gift, you need to buy a large wooden letter.
Then print out your favorite photos and make a collage of them on the letter.
Then coat everything with varnish, and the gift is ready!

5. Bouquet of chocolates
Look what a great idea - a bouquet of your favorite chocolates.
Not only the child will be delighted with such a bouquet.

6. “Bouquet” for a man
Miniatures of liquor, cigars, beef jerky...

7. Stones for the garden path
A nice gift for summer residents - decorative stones from which you can make a garden path

8. Gift in a jar
What a great idea to fill a jar with goodies and give it to your loved one!!!

9. Gift in a glass
Even a simple cocktail glass can be turned into an original gift wrapping

10. Photo pendant or magnet
To make such a gift you will need special parts and glue.

11. Mini photo album
This photo album is easy to make yourself. You just need to buy a suitable sized wooden box
and print out the photos that need to be glued together with an accordion

12. Glass with glitter
A double-walled glass makes such a glamorous gift.

13. Glass dish with monogram
Using special paint, a simple glass dish can be turned into an original gift by drawing a monogram on it

14. Homemade body balm
What could be better than natural cosmetics?
With just 3 ingredients, you can make this body balm yourself.

15. Homemade natural soap
In order to make natural soap, you need to buy a soap base,
and then add various useful ingredients to it: essential oils, herbal decoctions, etc.

16. Monogrammed hand soap
By decorating an ordinary bottle of liquid soap with a monogram, we will receive an unusual gift.

17. Candle in a jar
In order to make such a gift, you need a beautiful jar and wax

18. Homemade extract
Making such a gift couldn’t be easier, but you need to plan for 2-4 weeks of waiting, as the extract must infuse.
This extract can be used in baking or simply use a beautiful bottle of this extract as kitchen decoration

19. Hot pads
You can make original coasters from the letter chips from the board game Scrabble.
20. Bath accessories
Multiple bath accessories can be packed with creativity

21. Favorite recipes
Print out your favorite recipes, laminate them and hang them on your ring.
Such recipes are very convenient to use.
You can hang them on some kitchen utensil and give them as a gift.

22. Book-box
You can make...a box out of an old book!!!

23. Body scrub
This natural body scrub is very easy to make with your own hands.

24. Gift - hug
Such a simple, but such a cute gift for relatives living far away

25. Creative packaging
Ordinary things, such as money, chocolates and some trinkets, turn into an original gift thanks to this packaging

26. Bouquet of lollipops

27. Photo stands
Ceramic tiles left over from renovation, favorite photos and special varnish are all you need to create such a gift.

Whatever the special occasion, it is always pleasant to receive gifts and give them. It’s even nicer when it’s a handmade gift. Made with love, it will tell you much more than the one bought in the store. What can you give that is original and unusual?
Gift with sweets
This option is especially suitable for girls and children who love sweets. For example, an unusual idea is a kind of pot with moss, from which various sweets on a stick will stick out. You can take the simplest pot and pre-decorate it by gluing beads, sequins, coffee beans, etc.


Or you can not decorate it, but attach self-adhesive paper to it in a festive or bright style. First, the pot must be filled with something like synthetic padding or polystyrene foam, and then artificial moss must be placed on top.


DIY scented candle
To do this, you need to melt the wax, a colored wax pencil, add a little of any essential oil (or your favorite perfume) to the mixture and immediately, before the wax hardens, pour it into a greased mold.

The mold can be made of silicone or glass, but thin glass can burst from overheating. The candle wick must be inserted into the mold in advance and secured, or immediately after pouring the wax (while holding the wick so that it does not fall).

You can also decorate the aroma candle with anything you have on hand - coffee beans, cinnamon sticks (they can be wrapped around the candle and tied - it will be a kind of candlestick), any cereals and seeds, bay leaves, shells, small colored stones, etc.


Option for a girl
A hand-made bracelet made from beads or beads is a worthy solution for a gift. A garland of beads is also suitable for this. It’s very easy to make such a gift - you need to glue the beads to a form (the form should be an ordinary thin bracelet, without decorations) and tie the beads with a thick thread.

It turns out very creative and beautiful. If desired and possible, you can glue rhinestones to the beads, but then it is important not to overdo it with them, otherwise the product may look a little vulgar.


You can give a jewelry box as a gift. To build a box, you should stock up on square tetrapacks in advance. For example, milk cartons are suitable. You also need cardboard, good glue, and wrapping (or self-adhesive) paper. In addition to the main details, you can also take decor to decorate the box - these can be beads, braid, sequins, etc.

How to make a box
First, a rectangular base of the desired shape is cut out of thick cardboard, then squares from tetra packs are glued into it - as many as will fit. You will get several square zones in which you can put different jewelry - for example, rings in one zone, earrings in another, etc.

All this must be well glued and dried. On one of the long sides of the box you need to glue a pre-cut piece of cardboard - the lid.

Then you need to decorate it with wrapping paper (or paste it with self-adhesive paper) and any decor of your choice.

Box with edible gifts
For such a gift, you can use any beautiful box or jar and put goodies in there in layers - this idea is great for those with a sweet tooth. The jar or box should be decorated thematically, depending on the occasion of the holiday.

Photo frame decorated with seashells
If you go to the sea, then you probably have various shells. You can also use them as a gift! To do this, you need to take a simple frame, without decorations and preferably without bulges. The shells need to be boiled briefly, about 7-8 minutes, sanded with a block, then coated with varnish (transparent, of course) and pasted over the frame.

You can make a heart out of shells by first cutting it out of thick cardboard, painting it with white paint and pasting it with shells. In addition to shells, beautiful buttons, beads, and rhinestones can be used in this composition.

So, it is better to make either one large heart or several small ones - you will get a kind of picture of shell hearts. Just don’t forget to get a thick canvas and frame for such a “panel”.


Another gift option is jewelry made from shells, such as beads or a bracelet. To do this, you need to drill small holes in them and thread them into a thread of the required size.


Having imagination and available materials, you can prepare any gift with your own hands - as you can see, it is not so difficult. And it is not necessary to have a solemn occasion for this; sometimes you can simply please a loved one and give him a pleasant surprise, which he will gladly accept and appreciate. After all, such a gift will definitely be made with love, and, therefore, it will leave only positive memories.

Photos of gifts and decorations made by yourself


Gifts always It’s nice not only to receive, but also to give. And if you give a gift, handmade, then this is doubly pleasant.
There are a large number of gifts that you can make with your own hands, and many of them are not that difficult, despite the fact that looks very beautiful.
Find out what gifts you can make yourself.
Sweet birthday gift with your own hands
Both children and adults will be happy with such a gift. It’s not difficult to make, but the birthday boy’s delight is guaranteed.
You will need:
Sweets
Gift cards
Super glue
Potty
Floral foam (can be replaced with polystyrene foam or padding polyester)
Artificial moss or grass
1. Glue skewers to candy and gift cards.
2. Place foam, polystyrene foam or padding polyester in the pot.
3. Cover the foam with artificial moss or grass
4. Start inserting skewers with sweets into the foam (place the largest gift at the back and then distribute the gifts by size throughout the pot)
How to make a gift with your own hands. Coffee cup.
Any coffee fan will love this gift. If you are not yet familiar with the technique of decorating with coffee beans, you can read about how to make A coffee tree And coffee baobab .
You will need:
Coffee mug
Coffee beans
Cotton pads
White thread
Brown acrylic paint
Glue (hot glue or super glue)
1. Glue cotton pads to the mug. Cover the entire surface of the mug with cotton pads.
2. Wrap the mug with thread.
3. Apply brown acrylic paint (over cotton pads and thread).
4. Now start gluing the coffee beans. To avoid empty spaces, cover the cup with two layers of grains.
5. Decorate your cup with ribbon or lace.
Original do-it-yourself gifts. Coffee heart.
You will need:
Wire
Coffee beans
Can
Jute thread
Decorative flowers and ribbons
Brown paint
1. Prepare a sheet of paper, fold it in half and draw half a heart on one side. Cut out a paper heart along the outline.
2. Place the paper heart on the cardboard and trace it, then cut out the heart from the cardboard. Repeat for the second cardboard heart.
3. Prepare 2 wires and wrap them in paper.
4. Glue the wire to the heart.
5. Prepare cotton pads and glue them in several layers between two cardboard hearts to create volume.
6. Once you have a voluminous heart, cover it with cotton pads and wrap it with thread.
7. Paint the heart with brown paint and glue on the coffee beans.
8. Prepare an iron can and glue ice cream sticks to it in a circle.
9. Wrap jute thread around the wires that are glued to the heart.
10. Insert the sponge into the pot and insert the coffee heart into it.
If you wish, you can decorate the craft with ribbons, decorative flowers and/or other details.
DIY gift for a friend. Colorful scarf made from T-shirts.
T-shirts for such a scarf can be used as old ones or ones that you don’t wear, or you can buy inexpensive ones in the children’s or teenage clothing department.
You will need:
Scissors
It is advisable to wash the T-shirts before cutting them.
To make a stencil, prepare a business envelope and thick paper or cardboard. Trace the envelope and cut out a stencil from cardboard (see picture).
The front of the scarf is made up of designs and patterns, while the back is made up of plain sections.
1. Place the stencil on the material and, using a white pencil, outline the dark areas on the fabric, and brown or black the light areas.
* The front needed about 20 sections.
2. Once you've cut out all the sections you want, fold them the way you like and then simply sew one to the other.
3. Once you have sewn all the sections, iron your piece.
4. Now you need to make the back side of the scarf. To do this, you also need to cut out several sections, but in the same color, and sew them together. Sections can be made longer.
5. Sew the front and back of the scarf. If necessary, trim off excess on the scarf.
6. Iron the scarf - it is better to do this through gauze.
DIY birthday gift. Silhouette on canvas.
You will need:
Old magazines
Scissors
Glue (preferably decoupage glue - in this example it's Mod Podge)
Acrylic paint
1. To start, cut old magazines into small pieces (you can involve children - they will like it). Of course, the more colorful the magazine page, the better.
2. Once you have a bunch of cut magazine pages, you need to glue them to the canvas. To do this, coat the canvas with glue and start gluing pieces of magazine pages. It is advisable to cover the entire canvas.
* Don't worry if something is not glued very smoothly, unevenness is even welcome.
3. When everything is glued, leave the canvas to dry.
4. Prepare the desired silhouette (in this example it is a bird on a tree). To make a silhouette, simply draw it on cardboard or thick paper and cut it out.
5. Place the silhouette on the canvas and trace it with a pencil or felt-tip pen.
6. Now cover everything except the silhouette with acrylic paint.
DIY wedding gift. Heart made of threads.
You will need:
Wooden tablet or board
Thread of any color
The paper on which you will draw the heart
Optional: spray paint to paint the board
1. If you decide to paint your wooden tablet, then this should be done first. If you use a bright thread (red, orange, yellow), then it is better to paint the board in dark colors.
2. Prepare a large sheet of paper or newspaper, place it on the tablet and draw an even heart on it.
3. Nail nails along the outline of the heart and remove the paper. The distance between the nails is approximately 2.5 cm.
4. Prepare a thread and tie its end to one of the nails. Start weaving the thread from one nail to another. There are no rules here, you can weave as you like until the entire space between the nails is covered and you have a heart.
Cool DIY gifts. Intertwined hearts.
You will need:
Scissors
Felt (or thick paper or fabric)
Optional: tape.
1. Start with two ovals as shown in the picture. You can make them from felt or thick colored paper.
2. Fold the oval in half and make 3 parallel cuts from the fold to the rounded end, not reaching about 2-3 cm.
3. Start weaving the ovals as shown in the picture - threading one strip into the other and moving them upward. You should get a coloring of a chessboard.
4. You can add a handle for the heart so you can hang it in your home.
To better understand how to weave ovals, watch the video:
DIY wedding anniversary gift
You will need:
CD bag
Wrapping paper (colored paper is fine)
Vellum paper
Various decorations (buttons, letters, paper clips)
Photos (black and white or color)
Optional (but very useful): circle cutter (Fiskars cutter used in this example)
1. This case contains 24 pages. Cut 22 CD-sized circles from wrapping paper, and 2 the same size circles from large photographs.
2. You can print a few words or short phrases on vellum paper, which you can then cut out and paste into an album.
3. In this example, each page of the album is decorated not only with photographs, but also with phrases from your favorite songs, quotes and thoughts.
4. For the inner pages, you can use small photographs to which you can attach the desired phrases or poems.
DIY wedding anniversary gift. Instagram-style memorial album.
The main detail of this album is photographs of the first year since the wedding. This example uses photos from Instagram, but you can use regular ones. To print photos from Instagram, you can use the PostalPix program.
You will need:
Photos
Thick paper or card
Pen or marker
Decorations (stickers, glitter)
Washi tape, thick tape or thick paper (for the spine)
1. Cut out sheets of colored cardboard that are slightly larger than the size of the photographs. You can use small stickers and colorful pens to decorate each photo page and add a few nice words.
* You can use parts of the card together with colored cardboard, it will go well with the photos.
2. Using PVA glue, connect all the pages. To do this, place the pages in a thick book, leaving a space on the outside where you apply glue and glue the spine.
3. Once you have applied glue to the ends of the pages, apply washi tape to the spine. If you don’t have such tape, you can use thick tape, or thick paper and glue.
DIY gift for a guy or girl
You will need:
Small envelopes of different colors (purchased or homemade)
Thick sheet of paper (A4 cardboard)
Details (hearts, stickers and other nice little things)
Everything is very simple:
1. Carefully glue the envelopes to a piece of thick cardboard.
2. Prepare a regular sheet of paper (you can use several sheets of different colors) and cut out small cards on which you can write wishes, poems, quotes, etc.
*You don't have to make exactly as many cards as envelopes, as you can put surprises in the form of confetti, hearts, etc. in some envelopes.
You can place the finished craft in a file or a special paper bag and wrap it with ribbon, like a gift.
Original do-it-yourself gifts. Bright decoration for a gift.
If you bought a gift and made it yourself, then beautiful packaging will be very useful. The first impression is always important, which means beautiful packaging is already half the success.
Such bright packaging is suitable for a birthday or New Year. All you need to do is cut out any shape or letter from the sponge and cover it with decorative sprinkles, which are usually used to cover confectionery products.
You will need:
Decorative sprinkles
Scissors
Hole puncher
Super glue
2 toothpicks
1. Cut out the desired shape, letter or word from the sponge.
2. Use a hole punch to make a hole in the corner.
3. Cover the top of the sponge with glue. You can spread the glue over the surface of the workpiece using the remaining parts of the sponge. If you don't want to get glue on your hands, you can stick a toothpick into the sponge and hold it to apply the glue.
4. Now cover the sponges with decorative sprinkles and leave to dry - this may take 24 hours.
* Don't touch the sponge until everything is dry.

5. When the glue has set, turn the piece over and repeat the instructions in steps 3 and 4 on the back side.

6. Thread a ribbon through the hole made with a hole punch and attach it to the gift.

Unusual DIY gifts. Packaging of lilies.
Any gift for your mother, grandmother, sister or friend can be placed in such colorful packaging, which will serve as an elegant addition to your gift.
You will need:
Colored paper
Adhesive tape (scotch tape)
Stapler
Hole puncher
Yellow corrugated paper
Scissors
1. Cut out a square from a sheet of colored paper, approximately the same size as in the top picture (green square). The size of the flower will depend on the size of the paper.
In this example, squares were used, the side size of which varied from 7 to 12 cm.
2. Cut a piece of corrugated paper 12 cm long, and fold it to a third of the width and half the length.
3. From a square of paper, cut out an oval that resembles a leaf and wrap this leaf around a rectangle of corrugated paper. Secure it at the base with a stapler.
4. Make several similar flowers of different sizes and connect them all together with a stapler.
5. When you have 3-5 flowers in a bouquet, you will need to hide the place where they are fastened. To do this, simply cover them with a green paper leaf and secure with tape.
6. Using a hole punch, make a hole through the leaf and flower stems to thread the string or ribbon through.
7. Wrap your gift and tie a paper bouquet of flowers to it.
You can make as many lilies as you like.